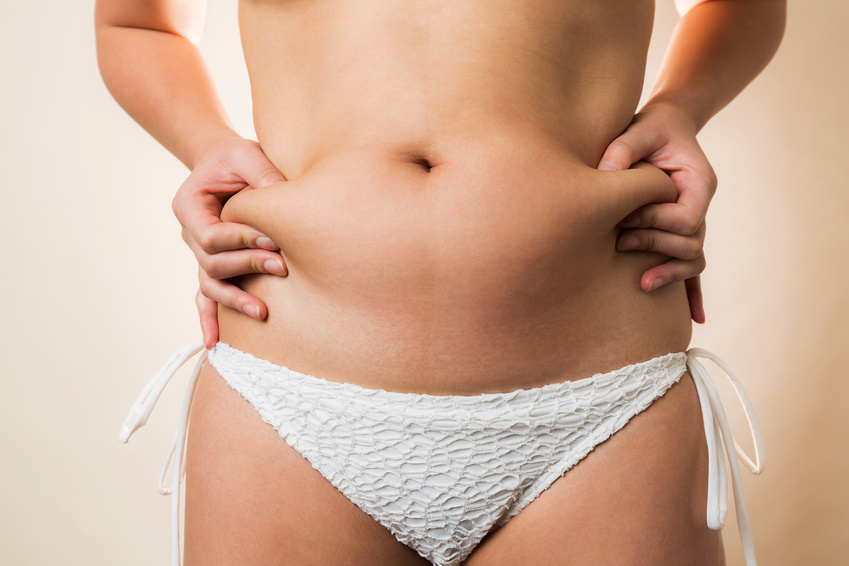
Quick Hits: When your .gitignore file gets…ignored

I made a mistake while creating a GIT repos that I’m hoping I can save you from making.  I made my first commit on a project and I realized that a bunch of files were getting in that shouldn’t be.  I created a .gitignore file, but the issue kept happening on subsequent commits.  As I learned later, you SHOULD create your .gitignore file first.  However, if you forgot, this is how you fix it:

  1. Keep your .gitignore file.
  2. Clear your GIT cache.  Don’t worry, this won’t delete any of your local files, just what GIT is tracking.
    git rm -r --cached .
  3. Add everything in your project.  Your .gitignore file will exclude what you want to ignore now and start tracking the good stuff.
    git add .
  4. Commit your changes.
    git commit -m "Now my .gitignore file works correctly!"

Happy codding!

Share
Posted in Version Control | Tagged , | Leave a comment

Quick Hits: Sass demands syntax perfection!

Just a quick note about sass.  Let’s say you had the following in /public/stylesheets/sass/foo.sass:

body
  line-height:1.2em

h1
  color:red

This would render a blank document for /public/stylesheets/foo.css.  You won’t get an error about it, you’ll just get a blank document.  Here’s the thing, when you’re declaring a CSS property, you MUST put a space after the colon.  Failing to do so will just wind up in parsing errors on the sass side.

I hope I’ve saved you some head scratching. :-)

Share
Posted in Quick Hits, Rails | Tagged | Leave a comment

I LOVE MonoTouch

Don’t get me wrong, XCode is great…in it’s own way…but as a .Net dev coming to the iPhone platform, MonoTouch rocks my world!

For the other devs in my shoes looking to play with MonoTouch, here are some things to keep in mind: Continue reading

Share
Posted in MonoTouch | Tagged , , | 1 Comment

How to Get Dropbox to Backup Files in Other Directories on Windows

If you’re using Dropbox (affiliate link), and you should be, because it’s awesome, you might have noticed that Dropbox will only backup/sync files inside your drop box folder; you can’t tell Dropbox to also sync with other folders.

Now, if you’re on a Mac or Linux system, just add a symlink inside your dropbox folder that points to the other folder you’d like to sync.

On Windows, if you want Dropbox to sync folders outside of your “My Dropbox” folder, you’ll want to use the mklink command to create a directory junction pointing to the other folder you want synced. For example, if you want Dropbox to sync c:\source_code, open a command prompt, navigate to your dropbox directory (cd “My Dropbox”) and type:

(Assuming you’ve already navigated to your “My Dropbox” folder)
mklink /J source_code c:\source_code

Bam. That’s it. Dropbox is now following the link inside the “My Dropbox” directory and it’s syncing c:\source_code because it thinks it’s just another folder in the dropbox. Enjoy!

Share
Posted in Uncategorized | 1 Comment

TDD Makes Software Go Faster

One of the gripes I hear about TDD is that it takes too much time. People look at the idea of it and think, “So I have to write code and tests and update the tests when the code changes? WTF?”

My message to you is: TDD takes less time, not more.

Today’s example: I’m writing some code that uses a parsing library written by a cow-orker. He’s a sharp guy, and the library generally works well, but it has a couple of undocumented behaviors – they’re mostly benign, and probably work for other users of the library, but for me it’s stuff that would result in misbehavior way up the call stack, or in another module entirely.

While I’m test-driving the code that uses this library, I notice the library itself does not have automated tests. The natural-feeling thing for me to do here is to test some sample calls to the lib to make sure it does what I expect. I know it’s not exactly canonical behavior to test outside libs that are assumed to be functioning, but it is good form to write tests that teach you about the system you’re building, and I needed to learn whether this library was going to parse my input in the way that I expected. The documentation wasn’t there, I wasn’t going to figure it out by inspecting the code (which is relatively complex), so tests it was.

Surprise, surprise – I found out that the library did NOT behave as I expected in every case. Had I not taken twenty minutes to write tests to introduce confidence in the parts of the system I didn’t know well, I’d probably have spent a couple hours debugging and looking in the wrong places for the problems I was having downstream. It also led me to a relatively simple solution where I extended the library class and just overrode the elements related to my handful of problematic cases, without changing his library or breaking code that depends on it.

As an added bonus, not only do I know what the documentation does not tell me, but I’ll also know if and when my colleague makes changes to his library that break the expectations of my code.

So I’ve reduced debugging time, increased my confidence in my code, and protected myself against future changes. I see it time and again – the time saved by writing the extra test code is well out of proportion to the time spent writing it.

There’s an exception here for developers or shops that are fetishistic about 100% test coverage, and do not judiciously use automated testing to learn about the system, drive design, and catch regressions. Writing tests to cover trivial/obvious code (i.e., writing tests that do not teach you about the system) is a time-suck. I’d avoid it, if I were you.

As long as I’m raving about TDD, I have to recommend the work of Kent Beck. I follow him on Twitter, I read his blog, and his book on TDD changed how I write software – I count it among the indispensible books on my shelf, with the GoF Design Patterns and Knuth. Check him out if you’re interested in deep thought about how software gets made.

Share
Posted in Programming, tdd, Testing | Tagged | Leave a comment

Quick Hits: Unit Testing iPhone Apps

I have a few things to add to the woefully incomplete official documentation on setting up automated tests in your iPhone apps:

  1. You need to add your main application executable target as a direct dependency of the test target, so that you’re always testing against your latest build. Do this by double-clicking on the test target, going to the “General” pane in the properties dialog, and adding your app under “Direct Dependencies”. (This was actually mentioned in the OCUnit tutorial for Cocoa, but not the one about iPhone testing.)
  2. Your linker needs to know about the objects you’re testing. An easy way to do this is to add the .m files for those classes to the “Compile Sources” group in your test target. You’ll also have to make sure you link against any frameworks used by these objects. (You could also tell your app target to export all symbols, then link your test target to it as you would a library.) (Thanks to Chris Hanson for pointing out this procedural improvement in comments.) You need to explicitly link the object files of the classes you’re testing. These are the “.o” files in your build folder. To do this: Double-click on the test target, go to the “General” pane, add a new item under “Linked Libraries”. In the dialog that pops up, choose “Add Other…” and add your class’s .o file.
  3. When you run your tests, one failure looks like two: Failed tests show up in Xcode as errors (just like compile errors, &c). Any test failure triggers a second error, and you’ll see something like “Failed tests for architecture ‘i386′ (GC OFF)”. The docs never say so, but this appears to be normal. Fix the failing test, and it goes away.

Anything else to add? Drop us a comment!

Share
Posted in iPhone, Programming, Testing | Tagged , , , , | 8 Comments

UINavigationController Tricks

For an iPhone UI I’m developing, I need to have one UINavigationController nested inside another, and to have the inner UINavigationController’s events push a view on to the outer one’s stack. CocoaTouch didn’t give this to me for free, but there was a simple solution.

This post assumes that you’re familiar with the fundamentals of iPhone programming, including view controllers, UINavigationController, and delegates. There is sample code for this post, which is released under version 2 of the WTFPL.

The Problem

I’m working on a multi-step UI for a game. Expressing these steps as a regular drill-down table-style UI on the iPhone felt cumbersome, and games can’t afford for processes to feel cumbersome; people will stop playing. One solution that occurred to me was batching related sets of steps in a smaller navigation table – so in Step 1 you’d drill through substeps 1A, 1B, and 1C before moving to Step 2. The fact that the whole view wouldn’t be replaced with every choice seemed like it would be less destructive of the user’s mental context, and the chunking of substeps should make it easier for the users to wrap their heads around the process. (No word yet on whether this solves my UI problem, but I like it so far.)

My UI solution contained its own technical problem, though: If I’m expressing the process steps in a UINavigationController, and expressing the substeps in a nested UINavigationController, how does the inner navigation controller notify the outer one that the user’s last substep choice completes that step and it’s time to move to the next step – or in programmatic terms, how does the inner UINavigationController tell the outer one to push a new view onto the outer one’s stack?

Or, putting it more visually, how do I get from here:

navcontricks1

…to here:

navcontricks2

In the non-nested situation when you wanted to push a new view onto a UINavigationController’s stack, you’d do the following in the current view:

[self.navigationController pushViewController:nextViewController animated:YES];

So in my nested case, I need to do that, but pushing onto the outer navigation controller’s stack from a view controller on the inner navigation controller’s stack. I tried a number of naive (but sensible-seeming) targets for the pushViewController:animated: action, such as:

self.navigationController.navigationController
self.navigationController.parentViewController.navigationController

Nothing worked. I set a breakpoint and drilled down through the members of self.navigationController, and no path to that outer UINavigationController was apparent.

The Solution

While investigating the innards of UINavigationController, I stumbled upon a writable property that looked like it might help: The delegate. When creating the inner UINavigationController, I added one line of code:

innerNavCntlr.delegate = self; // THIS IS THE MAGIC, PART 1

Keep in mind that this is called in the view controller on top of the outer navigation controller’s stack, so “self” has access to the outer navigation controller.

When the view on top of my inner navigation controller’s stack is ready to signal the outer navigation controller, I do the following:

// THIS IS THE MAGIC PART 2
UIViewController *topVC = (UIViewController *)self.navigationController.delegate;
[topVC.navigationController pushViewController:nextCntlr animated:YES];

A couple of notes: First, the view controller that creates the inner UINavigationController must implement UINavigationControllerDelegate, or you’ll get a compiler warning – but you can just declare that it does so in the header file, as none of the methods in that interface are required.

Secondly: If you’re like me, this feels like an abuse of the delegate property. Now there’s no reason that you couldn’t actually use that object productively as the inner navigation controller’s delegate – I just haven’t done so here. And the fact that the delegate property has to be casted to be used this way says to me that it wasn’t meant for this – explicit casts are always a code smell. (Anal-retentive types might want to put in some type-checking around that cast for safety.)

That said, it works, and I haven’t run into a maintainability problem yet, as this code doesn’t really get re-used in many places. Were I expecting to use this trick often, I might package up a subclass of UINavigationController (call it NestedNavigationController) that actually took an outer UIViewController or UINavigationController property. Then again I’m finding that in Cocoa, subclassing is often a code smell…

Got a better solution? I’m interested – please leave a comment below!

Update: Whoops. Comments are enabled now.

Share
Posted in iPhone, Programming | Tagged , , , , | 7 Comments

iPhone OS 3.0 GM Seed installation steps via iTunes & XCode

I couldn’t find these instructions in the iPhone Development portal, so I figured i’d share them with you here.  Once you download the appropriate GM seed, here’s how it’s done (I’m assuming you’ve already designated your phone as a dev device.):

  1. Make sure…
    1. to downloaded correct GM Seed for your iPhone (1st Gen or 3G).
    2. that your system and version of iTunes meet the requirements: 

      “You must be running Mac OS X v10.5.7 and iTunes 8.2 in order to install iPhone SDK 3.0 GM Seed and iPhone OS 3.0 GM Seed.”

      “You must be running Mac OS X Snow Leopard Final Developer Preview (Build 10A380) and iTunes 8.2 in order to install the iPhone SDK 3.0 GM Seed for Snow Leopard and iPhone OS 3.0 GM Seed.”

  2. Extract the firmware .ipsw to a folder.
  3. Connect the iPhone to your computer.
  4. Back up your phone!
  5. Open iTunes and click Restore while holding the Shift key (for Windows) or Option key (for Mac).
  6. Locate or browse to the firmware IPSW.
  7. Wait for iTunes to unpackage and install the firmware.

OR you can just use Xcode…

  1. Back up your phone!
  2. Open Xcode
  3. Open the Organizer (Window -> Organizer)
  4. Flip the software version to “Choose…”
  5. Select the GM Seed ipsw file
  6. You should  see a message that says something like “These changes will take effect when you restore you phone”
  7. Click on the “Restore iPhone” button and watch the magic happen.

By backing up your phone ahead of time, you’ll be able to tell iTunes to put all of your crap back on it when the process is done.  It’ll even try to preserve icon locations :)

Happy hacking.

Share
Posted in iPhone | Tagged | Leave a comment

Quick Hits:Deploying iPhone projects to your iPhone/iPod Touch

This process sucks. Period. To get you through the suckage, I found this article with clear and useful steps. If you’re becoming an iPhone/iPod Touch developer, this is something you NEED to read. The article presents the steps of the deployment process in the best order possible to improve your chances at a successful push.

Deploying iPhone Apps to Real Devices

Happy hacking!

Share
Posted in iPhone, Quick Hits, Uncategorized | Tagged , , | Leave a comment

Quick Hits: A great FAQ for iPhone game developers

I came across this video from Brian Greenstone, the president and CEO of Pangea Software.  You might remember him from such iPhone games as Enigmo, Cro-Mag Rally, or Bugdom 2.

He’s made a video answering “10,000 ft view” questions about iPhone game development that people who are new to the platform should hear.  What he’s saying isn’t revolutionary, but it’s a lot of very good advice in 1 spot.

Enjoy and happy hacking!

Share
Posted in iPhone, Quick Hits | Tagged , | Leave a comment